Wednesday, February 29, 2012

Just Add More Butter...

 DT Card for: 
Craft Us Crazy 
Challenge Theme: 
Inspirational Photo
Hello you wonderful crafty people! 
Puzzled by the title of this post?  As you can see, there are no photos of food here, but I'll explain.  Below is the picture that Craft Us Crazy is using for their current challenge and what a challenge it was for me.  That's a good thing!  When I first saw this bedroom set, I thought it was completely over the top, but the longer I looked at it, it started to make more sense.  The boldness of the bedspread and curtains, the subtle scored lines in the white headboard, the soft pink hues of the paint on the walls, the bold blue spurts of color in the pillow and whatever that wonky shaped thing is on the nightstand, it all really works together. It's fun, youthful, unrestrained and it just makes you smile.
That's great for a bedroom, but a card???
I began the card with only a large white scalloped base and then my mojo slammed on the brakes. (Dang washing machine just beeped at me...be right back; does laundry ever end?)..........

Okay! I'm back, 15 loads done and only 40 more to go. Blah! If you've followed my blog for a while, you've probably noticed that I mention my disdain for this particular domestic task quite often.  It would hands down have to be my least favorite chore.  A funny side note story to laundry. It has become a conversation starter when friends come over and see my laundry room and they always ask the same question. "Ummm, Can I ask why you have a picture of Jesus hanging above your washer and dryer?"  And my reply is always, "Well, I love that picture and the inspiration that I receive daily from looking at it.  I figure, why not hang it somewhere where I'll see it ALL the time and where am I usually at? In the laundry room! And who better to give me strength than him in the place that I need it the most!"
Just incase you hadn't figured it out....
I abhor doing laundry!

Now, back to the card.
This wonderful little dragonfly image is from our Sponsor, Robyn's Fetish and is called It's a Dragonfly Day. I colored this with a combination of Copics; of which I never write down, I apologize. 
So I have the blank white base and this image and that's all I had.  I had to start somewhere, so I decided to tackle the craziest element of the photo first, those multicolored stripes.
Miraculously, I had a fabulous little book of papers that I received from Audrey in a blog candy and so essentially, credit goes to her for saving the day!  The striped paper comes from the 6x6 Paper Pad, Country Drive, from Echo Park.  
After placing on the paper, things just went nuts!  
Just add more butter? Here's the reason for that.  With the groovy paper atop the base and the image, things were starting to look a bit better, but not great.  I really wanted to grasp the feel of the photo; however, I wasn't close, yet. That's when I realized that the television in the living room was playing The Food Network Channel and one of my favorite cooks is Paula Dean.  Talk about over the top, she's a riot, ya'll!  It seemed as though fate had intervened and right then Paula said, "Ya know what, ya'll? When I'm cooking and I like something I'm making, but I don't quite LOVE it yet...I add more butter!"  DING, DING, DING...the light went on in my head and the metaphorical measuring cups came out.
This card will NEVER fit into an envelope, lets just say that.  There is so much  oleo on this thing and now I just LOVE it!
I've scored lines around the main image to represent the head board and decorative wall, added a pink banner for the painted walls and the topping of lard was the blue yarn pom pom I made to represent the pillow and that still unknown object on the nightstand.
So, that's my crazy journey to make one card. 
Find inspiration all around you and if you can't find it, put some there!

We would truly LOVE to see what you create with this weeks inspirational photo over at  
With our wonderful Sponsor

 Heart attack on a card...
 That's all for me ya'll...off to do to that one thing again....

Hugest of hugs and Happy Stamping!
Lisa xx

Challenges I would like to enter this card into:


Our Creative Corner - Over The Edge
Sugar Creek Hollow - Inspired By A Photo
Crafting For All Seasons - 21; Shaped Cards


Tuesday, February 28, 2012

Your Life Is A Canvas...

Thank you so much for stopping in for a visit, I hope you enjoy the card and the amazing challenge that we have going on over at
Trust me, you are going to have "sew" much fun with this one!
The challenge for this two weeks is:

Joining in the fun with her amazing images at
is Krista, who is also one of our sponsors. 
She is offering the first prize winner... 
2 Digi images from her Etsy store!

I never thought I'd see the day where there would actually be an image that represented one of my most favorite things....
Copic markers.
But lo and behold, Krista has done it and I couldn't be more thrilled with this little gem, affectionately named Copica.


Oh, but the fun doesn't stop there, we also have another fabulous sponsor, Debbie, from
Who is offering a second winner 2 digital images from her online shop.
But wait,
there's more!
You won't want to miss Janette's fantastic sewing tutorial where she compares real stitch work to faux stitch work!
PLUS, the incredibly talented DT's have been busily making some superb inspiration and are also imparting tips to help make your sewing experience even better.

Color It Beautiful!
I designed this sentiment on my computer and printed it out onto white cardstock first.  After scoring the card, I masked off the center and bottom of the card and then used my brayer to color the exposed areas.  Then using an embossing folder, made the little design at the bottom.  Measuring the center of this design, I pierced 6 holes and then with varying colored thread, tied French Knots.
The yellow ribbon was scrunched by sewing down the middle of it and then pulling the string.  First time I've ever attempted this technique.
After deciding on my coordinating rainbow colored papers, I punched out circles and randomly placed them on the cover, saving room for Copica.  
This little canvas I found in the art section of Walmart and came in a package of 2 canvases and two little easels.  After coloring Copica with Copic markers, I adhered her to the foam square backed canvas and then placed in the center of the card.
Like papers were cut in strips for the inside of the card and then machine sewed on the edges.  A little message area was added and faux stitching done on the edges as well.

I'd also like to include that my tip for 
Top Tip Tuesday
is to check out this stitching website by
Mary Corbet called Needle n' Thread
She has the most wonderful videos for each stitch and thanks to her I was able to make the French Knots on this card.

Extra tip:  These miniature canvases and easels were really inexpensive and would be a cute  card and gift idea for someone.  By adhering the canvas to the card with foam squares, it can be easily removed and the recipient can place the decorated canvas on the easel to display.  
You could even stamp a sentiment under the canvas so it's not blank when the canvas is removed.

Okay, that's it for me on this card but before I go, 
A huge welcome to my new blog buddy followers and and as always,
thank you for making my day with your motivational comments.

Can't wait to see you over at

Hugs and Happy Sewing....
Lisa xx

Monday, February 27, 2012

"Hare's" a Flower For You....


Challenge #99 Theme - Easter/Pastel Colors
 Image Used - Bunny Basket

Well, hello to you!
Anything new and interesting going on in your life?  
I've recently found out that my son's senior prom theme for 2013, is duct tape.  Yes, you read that correctly, duct tape.  All accessories and articles of clothing are to be made strictly with tape.  He won't be a senior until next year, which is a good thing as I'll have one year to prep and coordinate his date's outfit as well.  We're thinking Mad Hatter type look or Jack Skellington; something unusual for certain.
Anyone know of a great way to whip out a tux in tape and still allow for movement or sitting?    All input is MORE than welcome!  I'll be sure to post pictures throughout the process and what a process I'm sure it will be!

But for now, and without the presence of duct tape, here is my card for our Easter/Pastel Color challenge and a quick rundown on how I assembled it.
The dress, hat and basket have all been paper pieced, the flowers were covered in purple, yellow and pink flock and the bunny herself was colored with Copics and lastly a trimming of Stickles for the lace and hat.

 We would love if you could join us over at
and if you need more inspiration, you won't want to miss the very talented DT ladies' projects also!
Thank you SO much for "hopping" by and saying hello.
Before you go, make sure you grab an "exempt from doing laundry" coupon on the table and a decadent pastry; all calories have been removed.  
High Fives n' Happy Stampin'...
Lisa xx


Sunday, February 26, 2012

I'll Pass On The Cake, But Thanks...


DT Post for 
Linky Party #78 
 This card is for a very special man in my life, my dad.   
You know that phrase, "Paybacks are a ....", I can attest that this is true and I've been waiting two years to zing my dad for the card he gave me when I turned 40!
I was nice enough to let his 60th go by without one single comment, but 61....
all's fair in love and war.

My dad has a wonderful sense of humor and if he wasn't still a marathon runner, snowboarder and water skier; I might think twice about giving him this particular card.  What am I saying?  No, I wouldn't....game on!

I know he'll find the humor in it and I hope you do too.

 I couldn't find a stamped sentiment that worked well enough with this image, so I had to make up my own.
 I'll be sure to give Dad a nice card too.  The sweet, sentimental, you're a great guy, yada yada, yada card too, but this one is much more fun to share.

Moving on to the fun part, here is my....
PICK OF THE WEEK! (or 2)
This fantastic scene was created by
Suzette at
Crafty Sentiments Designs
I absolutely LOVE how she's layered the clouds and the layout is fabulous!
And then there is this too...
This is from
Talk about a fantastic layout and all that texture and would you look at that tree!!!
Thank you SO much ladies for sharing all your talent with us at 
Make It Monday!

So please join us over at 
for our always Anything Goes, old or new, linky party and be sure to check out the ladies' wonderful inspiration projects as well as the incredible projects from all the amazing crafters who share with us!

This week our fabulous sponsor is
who is graciously offering the winner
a $10 Gift Voucher!
I'm so happy you clicked over for a visit and I thank you greatly for your encouraging comments.  As always, it's wonderful to hear from you and I hope I've left you with a laugh.
May your muse be with you always,
Lisa xx

Saturday, February 25, 2012

Bibbity Bobbity Boo!

Challenge #12 Theme - Autumn
Hello, hello, hello!
So glad you could pop in for a visit.  I'd like to introduce you to 
I've colored her with Copics of green and blue and vintage stained the edges.  Plopped on some scrap pieces of paper that matched her outfit, punched out a little black fence and glued on a cat that I had in my stash of buttons.  Topped her off with a spooky banner and wa-la an early Autumn/Halloween card is ready for later in the year.
Unbelievably, I did not add a quippy saying on this card, other than Bibbity, Bobbity Boo on the inside.  
I know there's lots of challenges out there right now with Christmas themes, but it wouldn't hurt to get a jump on Autumn cards either and we'd love to have you join us for our challenge over at 
 With our amazing sponsor 

Thanks, as always, for all your comments and encouragement.
I hope you enjoyed the card.
Hugs n' Happy Stampin'....
Lisa xx

Sunday, February 19, 2012

CAS Message...

Hello and welcome back!
Here's my little scalloped circle card for the 76th Linky Party going on over at
I decided for a simplistic card this week.
I've painted on my clouds and then formed a branch from tissue paper and a nest from moss as my cover focal point.
Then followed up the cover of the card with this cute little sentiment, Miss You Birdiefrom our Sponsor Meljen's Designs.
 Using the same bird but added the salutation for the backside of the card.
Sometimes a little goes a long way and I think the card pretty much says it all.
I hope you've enjoyed this card and can make it over to 
Make It Monday to join us.

Before I thank our generous Sponsor again, I'd like to show you my
PICK OF THE WEEK!
This wonderful winter land beauty is from Bettina
at 
I absolutely LOVE the coloring on this little fairy and Bettina's attention to detail on the snow and those adorable socks and her outfit.  Well, it's just ALL so stinkin' gorgeous!!
Thank you Bettina for sharing your talent with us at 
Make It Monday!

 Thank you so much to 
 for sponsoring our linky party and offering our winner the grand prize of 
4 single digis.  

Have a good one!
Lisa :)

Friday, February 17, 2012

And....."Action!"


Hey there! Hello, How are you?  
I'm so happy it's Friday and the beginning of a three day weekend!  My plans for this holiday weekend are to stamp, stamp and if I can squeeze in some time, stamp!  Laundry will get done when it gets done.....no rush.

Just wanted to share a couple of cards I made yesterday with these wonderful vintage images found over at 

These are titled

Here is the second one...
 If you'll notice the curled sheer yellow ribbon, I wanted it to curl and so I put a light coat of glossy accents over it and then wrapped it around a pen and let it sit for awhile.  Once I pulled it off, it curled beautifully.  My question is, is that how you all curl ribbon too, or is there another way I haven't thought of?  Inquiring minds want to know. 

That's it for this post, but my desk is covered in more images that I'll be working on today from Igancio over at 
I think you're really going to love these as well.
Oh and just a reminder, he is still having a 25% off sale for the entire month of February.  If you're interested, grab the promo code from the image below!


Thanks so much for stopping in and visiting.  
All of your wonderful comments just make my day!

Cheers and Happy Stamping...
Lisa xx

Challenges I would like to enter these cards into:

Our Creative Corner - Best Friend (Include a Flower); My BFF and I love watching movies together and we usually giggle the entire way through and miss half the movie.  It doesn't say BFF on it, but she already knows she is. Hope it still counts for the challenge. :)

Wednesday, February 15, 2012

Slight Mix Up....

Challenge Time!
Hi everybody!!  So glad you detoured over here for a visit.  
I have a great challenge to announce today for Craft Us Crazy and this 2 weeks theme is...
Favorite Color or Embellishment
Here are my choices:
Favorite color - Purple
Favorite Embellishment - Humor (Yes, I consider this an embellishment)

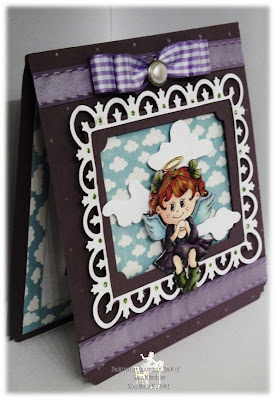
Meet Angel Donita from our sponsor
Which is perched among the clouds and purple.
 Now for my favorite embellishment...
I designed this sentiment and thought I'd share it with anyone who might be interested in using it.  


If your friends are anything like mine, they'll appreciate the humor and honesty of this card!
HAHA!

So that's all there is to it.  
Join us over at Craft Us Crazy with your favorite color or embellishment or both and be sure to mention which you chose in your post write up!

 Also check out the very creative and talented cards from the other DT ladies!
Special thanks to our wonderful Sponsor as well
Who is generously offering the winner a $5 Gift Voucher!

Signing off with a silly salutation....

"There are two different kinds of people in this world: those who finish what they start, and"
---Brad Ramsey

Hugs and Humor,
Lisa xx

Exposed Brick Gift Box and Tutorial


Grungy Vintage Gift Box
 I wanted to tackle three new projects/techniques for myself; one of which is a tutorial I created for the exposed brick, found at the bottom of this picture heavy post.
I've built the 4 drawer base and followed the tutorial here and then built the top box using only 4 envelope templates (picture below) and adhering their tabs together to make this.
The challenges I wanted to enter this into were asking that the elements be Grunge, Masculine Valentine, Vintage, 3D or dimensional and also another, to be inspired by a Paris Photo.
When I have to create something masculine, I really try to focus on the textures and keeping it simple.  I really like the interior decoration of an exposed brick wall and I was hoping to create it myself out of paper and have it look somewhat accurate.  I also figured a vintage car, and evil clown flirting with a young lady, a rustic shop sign using SU! hardware and a TH Dream ticket and a "make-shift" vintage lamppost might be other masculine items I could incorporate as well.  Oh and women's legs, don't forget the legs!  Thanks to Pamela at Free Vintage Digital Stamps, I was able to do my one stop shopping and all the images on the walls and the clown were found on her blog here.  The vintage car is a rubber stamp from Stampabilities.
I've kept the base very simple and masculine with the drawer and antique brad as the knob. I could have added more elements to the black, but again, simple, masculine, not too much to draw away from the box.

This was my first wall and "ehh" it's not bad, but process improved by the 4th wall.
I've also bent down the top tab of the envelope box and using Spellbinder's Fleur de Lis Rectangles, I've made the awning.  I was able to use the largest rectangle and then cutting the decorative border of the frame off, was exactly enough to make the awnings on all four sides.  Each was first colored in TH vintage photo stain and then distress inked in spots with TH Tattered Rose.  When dried, TH Picket Fence Crackle applied and then an extra coating of TH Clear Crackle to finish it off.

Here is a close up of the wall that has the women's hose advertisement as well as my make shift lamppost using the TH hinge die cut.  It's not perfect, but I like symbolic art so it works for me.  Off to the side, you'll see the flirting evil clown.   I sized them on Microsoft Word, copied the image and pasted a duplicate next to.  Taking the second image, I flipped it so that I could cut out both, adhere them together and no matter the angle, you'd see them clearly from both sides.
Here is the inside of the box, I've decorated with coordinating papers from Stampin' Up! Well Worn papers and Scrap Pad To Go papers.
I really wanted to add so many more elements on the base, but figured, keep it masculine, keep it simple and let the artwork of the walls do the talking.  Hopefully you like what they are saying!


Image showing the base of the project

Here are the four envelope templates I've traced to make the top box.

EXPOSED BRICK TUTORIAL

Step 1 -  I've used regular white cardstock and run through the BigShot with this brick embossing plate from Fiskars.  If you don't have this particular plate or folder, using a scoring devise would work just as well too.
Finished Embossing Product
Step 2 - Tear the papers as you would like them to look on the surface of your project and then paint with a small brush or toothpick, the "mortar" with Acrylic paint.  Here I've used Antique White from Homefront.

Allow the paint to dry before next step
Step 3 - Add drops of red dye to color the base of your bricks.  As you can see here, I've used TH Tattered Rose Distress Ink.
Step 4 - Next I highlighted the brick with a richer, darker red and dauber.  As you can see in the picture below, I only highlighted a portion.

Step 5 - Add browns to the red for an even richer color.  Color variation is totally up to the creator, but I wanted a mix of red and browns in mine.

Step 6 - Top it off with a clear glaze coat.  I've used crackle here, but Glossy Accents would work just as well too.

Step 7 - Affix the pieces with tape adhesive in the desired spots.

Step 8 -  Using a sponge, it's now time to cover the wall and brick to get the underlying exposed brick look.  I've again used the Acrylic Antique White. I've dabbed the sponge for more of a stucco look.  

Step 9 - Here is the wall drying and I forgot to take a picture of this but, once this is dry, I applied TH Photo Distress Ink over the entire surface once more.  Leaving the advertisement a bit lighter.  With a paper towel, wipe off the excess ink and you're done.
As you can see, this little gift box is really pretty versatile and would make a nice grunge, vintage, Paris aura looking Copic and whatnot holder after the candy is gone!

I'm so glad you stopped by for a visit and I hope you've enjoyed the tutorial.
Happy Stamping...
Lisa xx


Challenges I would like to enter this project into:

Studio L3 - Grungy Monday 36; Who Loves Ya, Baby?
(Also affiliated with these sites:  Tim Holtz website and Simon Says Stamp)
Inspired By - 10; Photo Inspiration
Sugar Creek Hollow - Masculine Valentine; vintage, shabby chic, or primitive style
Vintage Challenges - 34/35; Vintage Project in 3D or dimensional