Wednesday, May 28, 2014

A Time For Everything.....

Hello to you and welcome back!
It's the 5th project in a set of 6 for our little group, Technicolor Trio of Tempting Treats and here is my make for this week's project.

The elements for this challenge are the following:
1.) Triptych ( a set of 3 intended to be appreciated with one another)
2.) Drips and Drops to make a design
3.) Inchies
4.) Configuration of frames in any design or layout

I couldn't wait to combine all these incredible elements together because not only do I find them so pleasing to the eye, but...

Many of these items come from very special bloggers who have sent me care packages and I couldn't wait to create with them.

The clock you see here arrived in the mail yesterday from Mitra!! The stamp in the bottom left, that came from Sue over a year ago. It's one of my favorite background stamps.


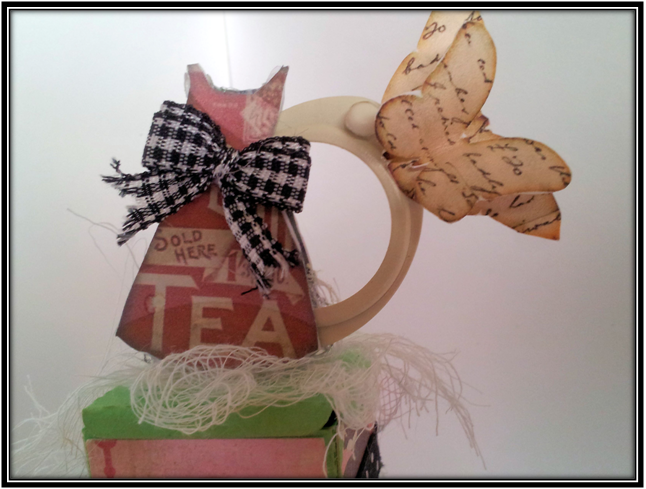
 I had to create a triptych design so I removed the clock face and stamped in Versamark this butterfly and then clear embossed with powder.

Distress Inks were then applied in Mustard Seed, Wild Honey and Broken China and then cut to separate to simulate the triptych style.

 I used my very old square punch to create a square of cardstock that would be my template to trace on some cork rings I found in a thrift store.

Cutting out the cork into four pieces and then covering them with burlap, crinoline, sheet music and newspaper, I now had the backgrounds for the inchies.
Another wonderful bloggy friend of mine, Lisa (L1)  just sent me these Glass Beads that you can mix with paints and WOW...so much fun!
Anyone recognize my little mixing cup and brush?  
Yep, it's the cup from Nice n' Easy Touch Up for gray hair.  LOVE the cup, had to recycle that!


 Okay, so here's the glass beads painted on with Bundled  Sage and in the background you'll see that I'm getting ready to spritz color to make a faux patina base.

I spritzed with Melted Chocolate, Fresh Lime and later on decided to add Vibrant Turqouise in Dylusions Ink Spray.
Mercy me! Would you look at that texture and color?  I loved doing the spritzing and watching as the drips rolled down the clock.
Once the colors were done running, I heated them with a heat tool and watched as the bubbles and more texture arrived.

The green, blue and brown are the colors to use for creating a patina, but now I needed to subdue the color and let the Bundled Sage take over again.


 Another close up showing the colors as they drip and glide over the glass bead and gesso base.
Here I've started adding back over the top a mixture of  Bundled Sage, Antique Linen and Picket Fence Distress Paints.

Next phase is to add more frames. 
I cut out two paper frames on my Cameo and then glued them to actual metal frames that were then glued to the sides of the clock; which I also used as a frame, of sorts....
The addition of Shabby Blue Opaque Frantage was added for the golden hue of the patina and I'd love to thank Sandy for that as well!!!

These are the finalized photos where you can see the theme of my project coming together.

I couldn't resist using this measuring tape ribbon and that had a school time, childlike feel to it, so I went with the idea that from childhood, one's dreams are created.  There should always be time for cultivating those dreams and for keeping a playful attitude in everything we do.
So, I needed little inchies and these children from Ignacio at Nicecrane Designs gave me the perfect little images.
These are called Amazing Cute Kiddies II; which will be arriving in his store shortly!

Here is the right frame with butterflies from Ignacio's set called Colorful Spring Butterflies 3

The center theme with Play

And the left frame with Dream and more butterflies.

And there you have it,
Dream, Play, Laugh...
wonderful words to live by

 I had such a blast making this and I can't wait to see what Onion and Mitza Pitza have up their sleeves. Please pop over and take a looksie too!

OH, one last thing. 
Two weekends ago I found a cool idea on Pinterest and my husband was completely on board!
Items necessary for the task, Frog Tape, Washi tape, and concrete paint.
Our front porch thanks to crafting supplies and paint...WOO HOO!

Thanks so much for your visit.  I truly appreciate your time and comments.
Hugs n' Happy Crafting,
Lisa x

Wednesday, May 21, 2014

Interpretive Art ???

Hi there!
 This is the 4th project in the Technicolor Trio of Tempting Treats and this week's objectives are...
1.) Mixed Media
2.) Collage
3.) Glass Jar  Creation
4.)  Material

I began with a crumpled piece of cardstock and added tissue paper and white streamer with 
Mod Podge.


 Still new to the Mixed Media way of things, I began by what I'd committed to memory, "nothing is wrong...add it all."  So I did.

Here are stamps, torn papers, inks and spritzes.


Had so much fun that I added more stuff like twine, corrugated butterfly, molding paste a manila tag and some distress ink pen hand drawn doodles.
Here is my mixed media background completed
It lays on top of the burlap material inside the shadow box.


Well that process got my senses all jived up and my inner child was screaming for more, so what the heck....

Let's glue sticks standing in a spoon!


 Why of course it's a small forest growing out of metal with a bicycle!

Likewise, it would seem only natural that two small people should join it while encased in a miniature glass jar.
The randomness of the umbrellas is purely for enjoyment.
I just finished watching Saving Mr. Banks, so perhaps they stemmed from my love of Mary Poppins or maybe I just find umbrellas "super-cala-fragalistict-expialidociously" fun.


It's true that my little people are on display in a jar, but at some point they had to have had a way to reach their predicament and I figured a ladder would have done the trick. 
So, off to the garden for mulch sticks.


Here is the completed outcome of Project D


I'll leave it up to your imagination for interpretation, or not.
 Either way I'm just so glad you spent the time here with me and I hope you enjoyed seeing the process.
Hugs and Happy Crafting!
Lisa xx
Here are the links to Mitra and Sue's AMAZING takes on this week's assignment.
Until then...
TTFN

Sunday, May 18, 2014

My Blocks of Keepsakes ...

Hello! Hello!
I'm excited to show you the latest cut file from The Cutting Cafe called Blocks.
Here is my creation using the set of all 3 block sizes.

Each set of blocks come with either an attached or detached lid.  Here I've cut out the 3 sizes of blocks with the attached lid and their corresponding layers which come with the file as well. The small black items are hinges that are included for accessories and you'll see those later in the photos.


If you look at the above photo, you might think that this project is a bit large; however, I wanted to give you adequate size proportions by pairing them all with a mouse.

Here you can see that you actually work on quite an adorable small scale.


 And the boxes decorated up with their          corresponding designer paper layers.


A close up of the smallest block on the tier
The second largest block.


   And here you see the base of the blocks; the                      largest, that measures  2.5".
              Big enough to handle 4 wood feet.
Places for keepsakes as each box opens


 Remember when you saw the hinges at the beginning? Here they are on the backside of my 3 block tier. I personally think Regina did a FABULOUS job on this cute cut file and there are so many extras included with this too. She even made pieces to turn the blocks into piggy banks!
So come on over and join in the fun at

Thank you So much for stopping in and I hope you have a crafty week!
Hugs,
Lisa xx

Wednesday, May 14, 2014

I Love Lamp....

Hi there! Hello! How are you??
Have I managed to confuse you yet? The title says I Love Lamp and here I am showing you flowers. It's okay...you haven't lost your mind, it will all makes sense momentarily, but first...

My grammy wanted me to tell all of you that left her birthday wishes, "THANK YOU!" She was tickled pink to see so many sweet comments left for her and she made sure to remind me, every chance she could, to let you know how MUCH she appreciated that. So again, thank you so much for making her 88th birthday even more special.

Okay, now on to the post.
It's time for the Technicolor Trio of Tempting Treats Project C.  
The challenge where Sue, Mitra and myself each have to use the items below; however we wish.
The components for this challenge are the following:
1.)  Layers and Textures using circles
2.)  Odd marriage of 2 items
3.)  Stars
4.)  Dictionary Depictions

What you see here is a sneak peek of Live 


The best part of these challenges is that anything goes. As like the other 2 projects, I had no idea where this would take me either, but I grabbed these old wooden chef plaques and some circle items and set out to begin the journey.


 Dictionary depictions were element #4 on the list of required items so I began by tearing out specific pages that contained the focus words I wanted and began making the background for whatever these were to become....
Little glimpse of Live, Laugh, Love Dictionary pages and some Gesso
  
Some call it frugal, but I'll call it what it is..I'm cheap! 
Here is a shot of my handmade stencils and paste and of course the ever fancy application tools; old plastic gym membership card and kitchen sponge.  
This process begins meeting the criteria for element #1; Layering and Texture with Circles.


Oh pretty colors of Dylusions Ink!


 You're not going to be able to tell here, but I wanted to play around with photo paper and inks and here is a piece I made with an embossing folder and Dylusions Ink.


The brown on the letters is from Distress Ink.  The colors really popped on the shimmery photo paper and I loved the way the inks ran naturally on the texture; excluding the step of spritzing water.

Here's a close-up of my mixed media drawing that I've done for the second plaque.  You can see the continuation of circles that create her hair. I used Copic markers for all the mixed media coloring.  Her hair is just in the beginning phase at this point.


Now the plaques are finished, but I'm thinking they look kind of, how do you say? Blah!  My concern is that if I try to hang them up individually they'll be all wonky on the wall, so I had to devise a plan that would make displaying them easy peasy.  
But for now, let's just gaze upon their beauty, shall we? LOL!

Live BIG

Laugh LOUD
(The irony. I drew her mouth shut, but the jewelry and hair fill the LOUD part)

And now for the element that meets criteria #2 (odd marriage) and #3 (stars)
Love LAMP
Huh???  Yep! Love Lamp!! 
 My son found me sitting in my craft room reciting words that go with Love, like...."lots, much, forever, strong, etc" when he burst out "Lamp!" It was perfect. If you've seen the movie Anchor Man, you'll recognize the humor of this and if you know me, you'll know I'm a fan of quirky and I found this completely fitting for the odd marriage of items.  Also, the lamp is a pull string which I've symbolized with wire and the metal star.  

Just encase people were baffled when they read the trio and got to Love Lamp, I didn't want them to try to work too hard for the deeper meaning, because there simply is NONE.  So, I added an array of various question marks to convey that this is supposed to make you go, "HUH?"

Finished by matting them each on black card stock and then gorilla gluing them to a poster board that is spray painted with a vintage cream texture.
Pretty eye candy and a giggle, the good life!

Well, that's challenge C and we have 3 more to go so I'll be back next week with another who know's what creation, but until then thank you SO much for getting all the way to the end of this post with me and I hope you enjoyed yourself.  But remember, don't stop here, please visit the rest of the Technicolor Trio and see what they created!!! 
Sue here and Mitra here

Hugs and Happy Crafting,
Lisa xx