Showing posts with label Organizing Ideas. Show all posts

Thursday, September 17, 2015

My Feng Was SO Not Shui... Until Now!

My yin couldn't even stand to look at my yang and it had been that way for over a year in my craft room.  Sure, I'd craft in here, but I never really felt it was cozy or "me."  Then, one fine day, Regina from The Cutting Cafe, assigned this set to use for an upcoming project and OMG...happy dance, my entire craft room came together. Crazy how one piece can bring harmony and I'm so happy it did! First I'll share this awesome holder and then I'll share my happy crafty place.

I love the rustic country, antique, metal, crackled look, so that's exactly what I set out to make with this cut file.  It started with a roll of metal tape.  After the outside pieces were cut on my silhouette cameo with standard white cardstock, I covered them with tape.  The inside pieces of this holder were simply embossed, painted, distressed and sanded. I wanted to achieve three distinct looks in one.  
Here's a close-up so you can see the faux metal on the outside. I achieved this by painting gray paint directly over the metal tape. Secondly, I randomly blotched with rust, cream and black paints until the patina I liked was achieved. A little sanding with a nail file was done too. 
The third look is the rustic country, so I used sheet music to fit that bill!
An old wire was twisted and attached to make the perfect hanger for all three holders.
This file even come with labels. I kept my titles fairly general...
And here it is with the tab dividers as well.
I had so much fun with this file and thanks to this piece, I now have a wonderful craft room that fits my style just perfectly.

And now, welcome to my craftroom aka tiniest bedroom, where things now make sense and the muse is happy!
I should explain first, I'm a hoarder collector of things hand-me-down, thrift stored, abandoned on the side of the road, and cheap.  Now, that's all good and well, but the problem was trying to get it all to mesh and feel like a craft space that worked in the tiniest bedroom of the house and feel cozy. And by cozy, I don't mean cramped...

So here's what I did.  If it was ugly but functional, it got painted.  If it had cutesy on it, it got sanded off, if it was just a cool piece, it found a purpose.

The ladder was a yard sale find for cheap and I painted it black (it was hunter green before). The tins sitting on it were from the Dollar Store and were silver with flowers etched in. I took a hand sander to them and sanded off the painted flowers and then painted them white and made my own stencils to label them. They say "This & That" "Wingdings" "Good Stuff" and "What Nots" now. The night stand that is under the ladder was from eons ago and that was also green (what's with the green?) and as you can see, I've painted it black and added new hardware.  The piece holding various rolls of paper and wrapping is our old mailbox.  The antique cabinet is the very special hand-me-down from my mom.
Now looking to the left a little more, here's my desk.
Sitting on the top shelf of my desk, next to my basket of materials holder, is that precious and inspiring folder holder from The Cutting Cafe
YEAH, feng shui at last!!
The desk against the wall I found at the Salvation Army (Which I just typed incorrectly as Salivation; even though I did salivate when I saw they only wanted $10 for it.)  I
I LOOOVE the big huge corner desks that you see in ads, but I couldn't justify spending all that money if I already had a desk and a table, SO, I somehow managed to corner it fairly well and now I have double the work space. 
And turning to the left side of the room.  
The black armoire (which used to be...can you guess the color? Yep, green) and the cream cubicle piece that I found on the street one trash day.  The container holding my ink pads is an old cassette holder and then just some fun stuff that the kids made me and things that make me happy to decorate with.
The closet
Plastic shoe organizer on the inside of the right door is a great way to hold your cards when you need a place to store them.
And that's that... my hodgepodge studio.  
I've just loved having you in my craft room for a visit. I hope you've enjoyed yourself.

All DT projects are posted at The Cutting Cafe Blog on the 7th and 21st of each month. We'd love for you to visit and be sure to leave a comment for Regina. She selects one lucky person to receive 3 FREE files of their choice!

Hugs and Happy Organizing,
Lisa x

Saturday, June 6, 2015

What Happens When You Feed Your Children Vegetables.....

The answer to my post title is.....They Grow Up! (and you lose your mind....)
HELLO you wonderful people whom I have been missing for what seems like forever.

Long story short.  Our daughter transferred to a new school. They added up her credits and she had so many honor classes that she qualified to graduate a year early. You'd think I'd be all like, 'YEAH', but really it was more accurately like, 'WHAT THE ....' because we found that out in April and had 3 weeks roughly to plan a graduation party and apply for college.  Needless to say I've been in a crazy place for a bit.  
So, when Regina designed this amazing product Design Team Planner Set, I knew I had to make it to help preserve what brain cells I had remaining!
It's got ALL KINDS of cool stuff that makes my life easier, like a calendar, and tabs, and pages and pages full of ways to make being on a Design Team MUCH more ORGANIZED! 
Yeah Regina! You're a life saver!!
But wait, there's more! If that's not captivating enough, you're not going to believe this Craft Supply Planner Set she also created.  Here is a picture of her book below.  
Talk about oodles and gobs of organizational pages....it's unbelievable!
She's even created a sheet to organize your Washi tape collection!
I now have peace of mind when I come into my craft room and despite all the other crazy that is floating around, at least in my little art room, I know I'm on the ball!
All of these files are available @
Also wanted to share that I used more files from The Cutting Cafe to bring the BIG party together.
Here is our daughter and son when they were 'wittle bitty'....
They have a wonderful relationship.
This is actually last year's family photo that is hanging on our wall. LOL! I love it :)
And here they are all growed up this year.
EEK...she's graduated!!
The table setting getting ready for the party
And do you see that little box to the right on the tree? 
That's a present box from the Little Red Wagon Box template.
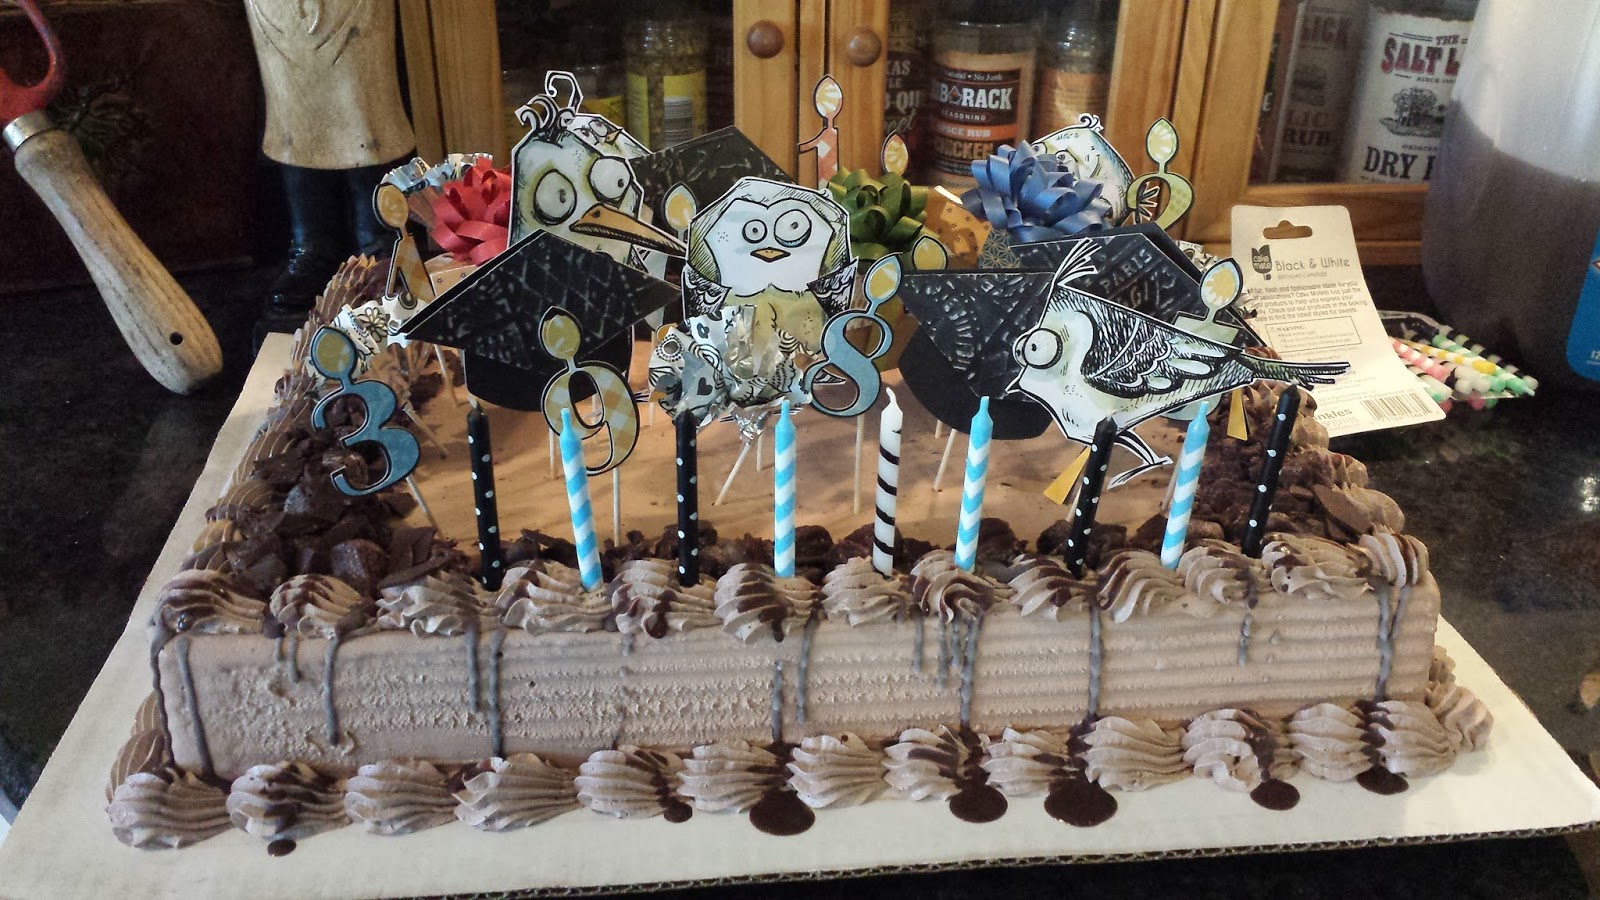
Because we were already planning a Mother's Day and several birthday's party, we had to add the very special Graduation Day into it as well so it officially became the 
Happy GradMoBirThersUation Day Party!!
That is why you see the multiple randomly placed numbers, the graduation hats, the boxes for presents, the flowers for Mother's day and the hysterical Tim Holtz birds that just look plain confused, because that sums it up perfectly.
Credit goes to my wonderful blog buddy Richard for the theme inspiration (what to do when there's mass confusion)....check this out!
Anywho, I'm back now with a few less marbles than before, but I'm so excited to visit all your blogs and catch up!
Biggest of hugs to you and Happy Crafting,
Lisa xxx

Sunday, January 4, 2015

Stuff is Awesome. Stuff is Good...

Have paper? Then you make this.....
A NEW CAR!! (No, just kidding,not a car) but a A NEW STORAGE BOX!
I made this in a few short hours and you can too with the incredible file from The Cutting Cafe called Dresser Set Box.  If you click here, you'll see how it can be altered from three adorable drawers on a dresser to twelve, like I have done below.
The file comes with alternating drawers to choose from. You can either have a straight edged drawer or a drawer with a curve. I chose to use both. The possibilities of this file are endless!
Once boxes and drawers were assembled together with glue, I added cardstock around the edges to give a finished clean look, then I added folder embossed foil tape to the edges and began grunging it all up to fit my craft room.
STUFF was created by having the cutting machine cut out each style of the letter in various fonts, several times each. Gluing the layers together for depth and then adhering them onto a base board of cardstock.  I meant to glue some of the letters backwards for a neater 'letterpress' look, but totally forgot in the fun of it all...
Great way to use those scraps you're holding on to by decorating the drawers.
Added some buttons and knobs to the stratight edged drawers and my stuff holder box is complete 
and all thanks to
If  you save this blog website on your sidebar, you'll never miss the fabulous makes of the DT and you'll also catch the great sales that Regina posts weekly! 
Thank you so much for your visit.
Hugs n' Happy Crafting,
Lisa x

Tuesday, July 23, 2013

Do They Hang Low? Do They Travel To and Fro???


 Ohhhh boy! I know what you're thinking!!  
"What on earth is Lisa singing about ears for???" Hee hee :)
Well good news...I'm not.
I'm referring to.....

Baker's Twine!!!!

That's right, twine. Over at the ever fabulous
our very own sensational Lisa S. is hosting this go around challenge of
Spooled Items!

So I figured why not make a cute little organizational box of Kraft paper spools to hold my twine spares.  Then when I saw this audacious and over the top fun image from QKR Stampede called Old Lady, with the spools of hair rollers on her head, I just knew I had to pull it all together somehow.  

Come on over and enjoy the fun and share with us a project that you've made that has incorporated something that comes from a spool. For example,ribbon, twine, wire, etc...
While you're there, submit your entry for the opportunity to win a prize from our sponsors, QKR Stampede and Bugaboo Stamps and don't forget to leave a TIP!

Thanks so much for your visit!
hugs n' happy stamping,
Lisa xx